This article is about the original Webnode editor. If your site was created in the new editor, you can go to our knowledgebase for new editor.
Tags are words and/or phrases that describe the content of your website. Tags make it easy for your visitors to navigate through the content. With Webnode, you can add tags to pages, articles, images in the classic gallery, catalogue items, products and categories. All tags are displayed in a content block.
Adding tags
1. In the website editor go to the page where you want to add the tags.
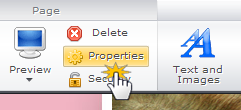
2. In the toolbar, click on "Properties".

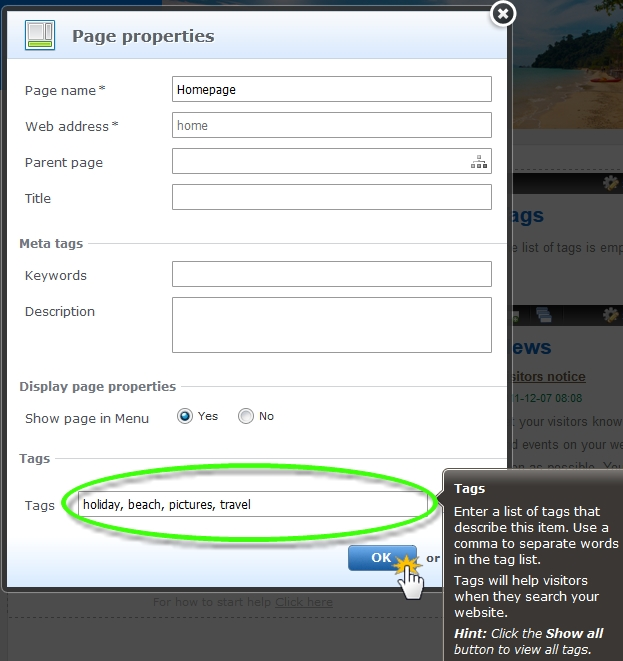
3. In the bottom of the window "Page properties" you can insert tags as appropriate. When done press "OK".

Inserting a Tag cloud
This displays all the tags of your website so visitors can access the page where they were inserted.
1. Go first to your website editor and then the page where you want to add the widget.
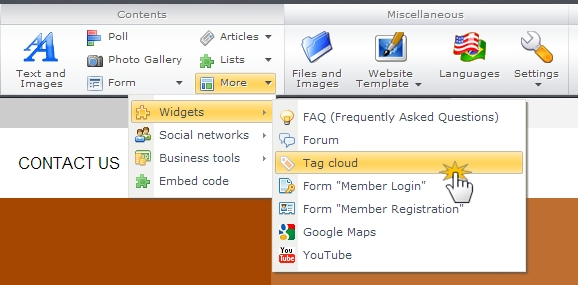
2. Click on "More", select "Widgets" and then "Tag cloud".

3. At the bottom of the page there's a block with all tags. These tags will be represented in different sizes. The more frequent the term is used on the site, the bigger the tag's size, and vice versa.
Tip: Click on "Settings" on the top bar of the label widget to configure the maximum number of tags for this page. Confirm by clicking "OK". Also, you can delete the entire tag block by clicking on the red X above.

